Yomi 2 is Crowfunding

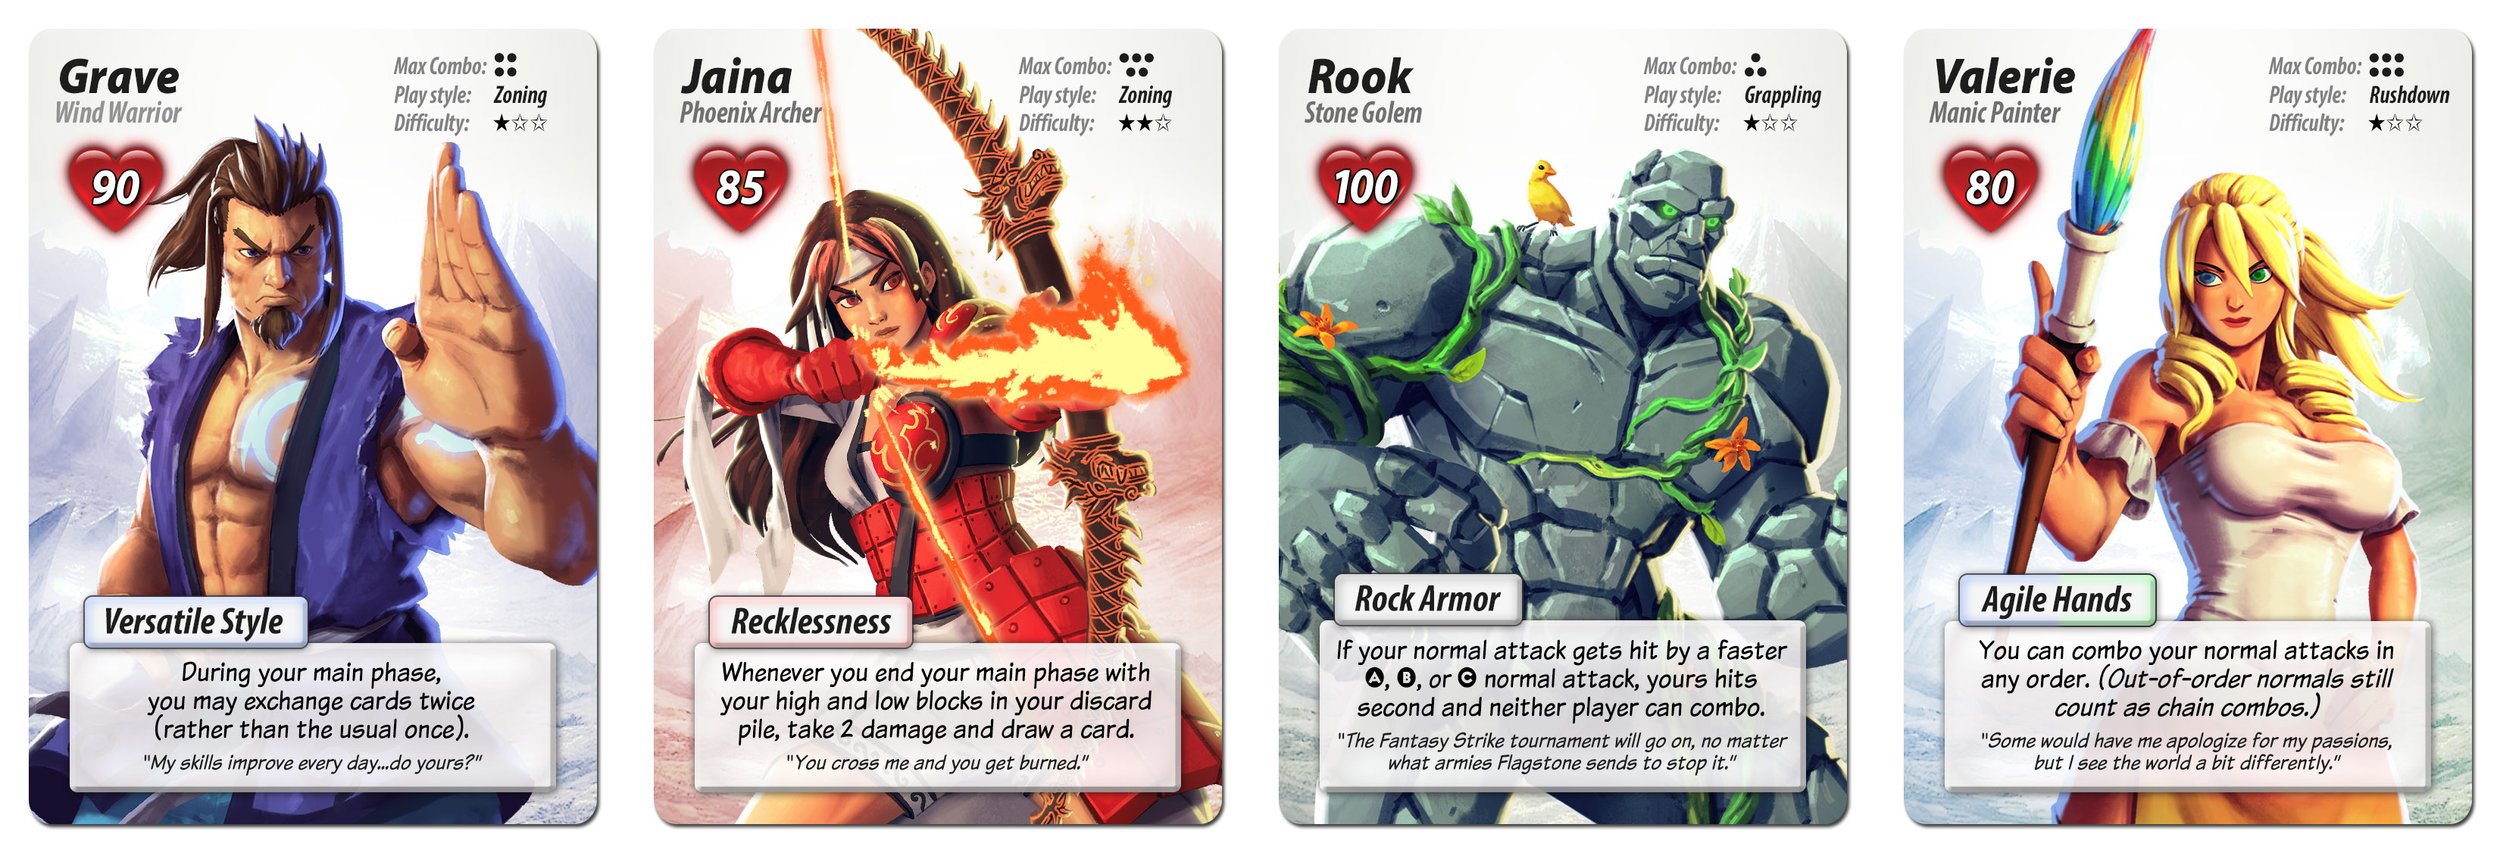
Yomi was, as far as I know, the first “fighting card game.” It was pretty popular, had a ton of tournaments, online versions on Steam and iOS. Now, 15 years later, I have a sequel: Yomi 2.

Yomi 2 is not “a new edition” but rather an entirely new game. Now there are high and low attacks, high and low blocks, projectiles, bursts, and many other changes. Despite all those new things, the game is actually more streamlined and plays faster than before. Design-wise, two of the biggest features are gems and the exchange system.

Gem cards are set of 5 cards per gem color that let you augment and adjust your character. Want a bit more damage and projectiles? The red gem will help. Want a more super cards and super meter? The green gem will help, and so on.

The exchange system now lets you exchange a card from your hand with a card in your discard pile if both have the exchange symbol. You can only do it once per turn, so it’s a limited resource. This lets you get back your valuable blocks if you lose them, it lets you build up bigger combos if you want that, it lets you fill in missing moves, like if you have no throws or dodges ready, and it lets you set up for a “power up” which gets you super meter and a super card. There’s lot of ways to go, but you’ll have to choose which maneuver is the most important each turn.

Yomi 2 also has a solo and 2-player co-op move that’s pretty well built out with 5 different automated opponents in the Morningstar set and 5 more in the Flagstone set.

If you’re interested, please pledge for Yomi 2 on Gamefound. People who pledge during the campaign actually get the Fairview City expansion for free.


Puzzle Strike 2: Puzzle Pets deck

Puzzle Strike 2’s expansion, called Bold Adventures, has four new community bank decks as well as 10 more characters. The fourth of these bank decks is Puzzle Pets.


The creatures are the star of the show in Puzzle Pets. In Puzzle Strike 2, creatures give you access to ongoing effects, meaning they stay on the table indefinitely (giving you a bonus) until they are destroyed. Most decks have a few creatures, but Puzzle Pets puts the emphasis on creatures.

Puzzle Pets creatures have a special mechanic to level up (or “evolve”). Each of the four colors has a level 1 creature that’s common in the community deck. For example, here’s Crattle, purple’s level 1 creature:

 
crattle.jpg
 

Crattle costs 1 action to play. Just below that, his card shows that it costs 2 actions to upgrade him (to become level 2). You can’t upgrade a creature the same turn you play it, so you’ll have to wait until the following turn. When you do upgrade a creature, you fetch the level 2 creature of the same color from a side deck of cards and put it on top of your level 1 creature, replacing it.

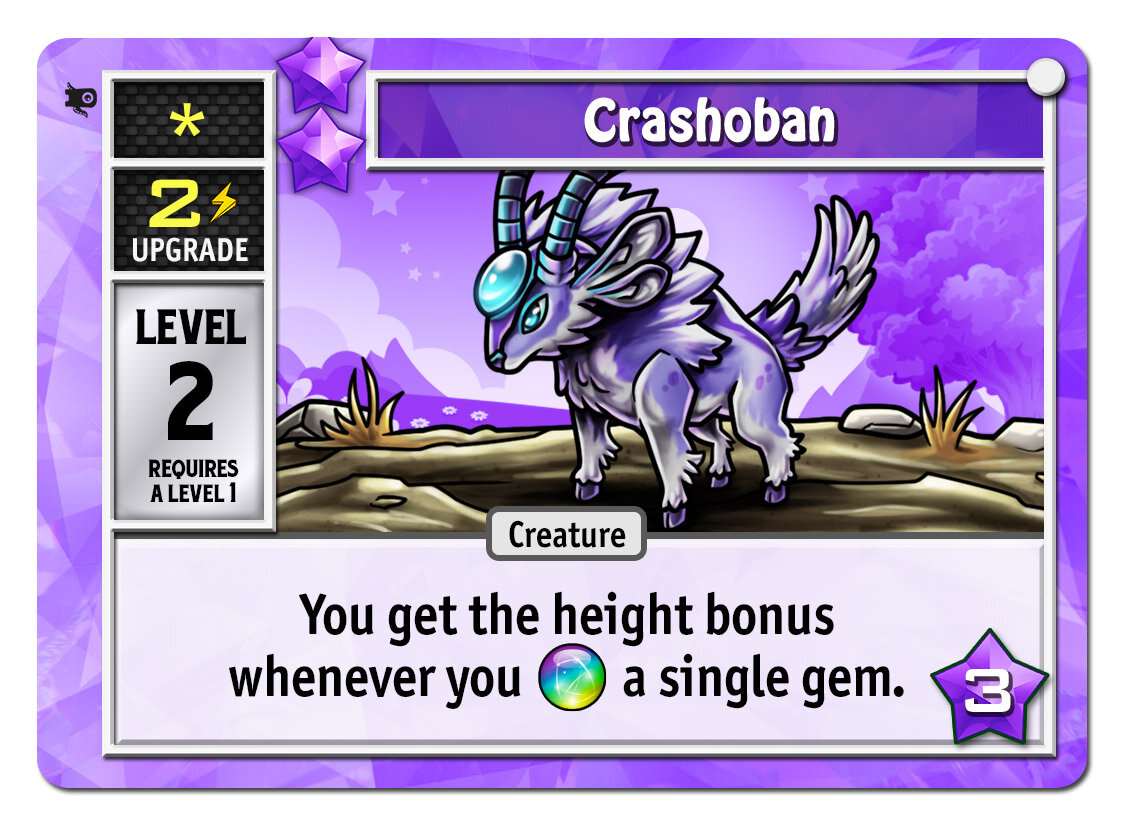
Here’s the purple level 2 creature, Crashoban:

 
crashoban.jpg
 

Crashoban’s ability is somewhat similar to Crattle’s, but Crashoban’s is much more powerful. Normally, when you crash only a single gem (rather than a run of multiple same-color gems) you don’t get the height bonus at all. For example, suppose you have 12 gems in your gem pile and you’re trying to dig yourself out to survive. Imagine that your top three gems are all different colors, so getting rid of the top two will (unfortunately) require two different crash gems. Normally, crashing the first will send 1 gem to opponents, and crashing the second gem will send another 1 gem, for a total 2. But if you had Crashoban, you’d get a +4 height bonus for each of those, meaning you’d send 10 in total. It’s so strong that you can realistically win the game with Crashoban.

You can upgrade Crashoban to level 3, and his card shows that it costs 2 actions to do so. You can’t upgrade him to level 3 on the same turn that you got him to level 2, so you’ll have to wait a turn at least. Once you do upgrade Crashoban, just flip the card over. On the back, you’ll find purple’s level 3 creature, Crashizard:

 
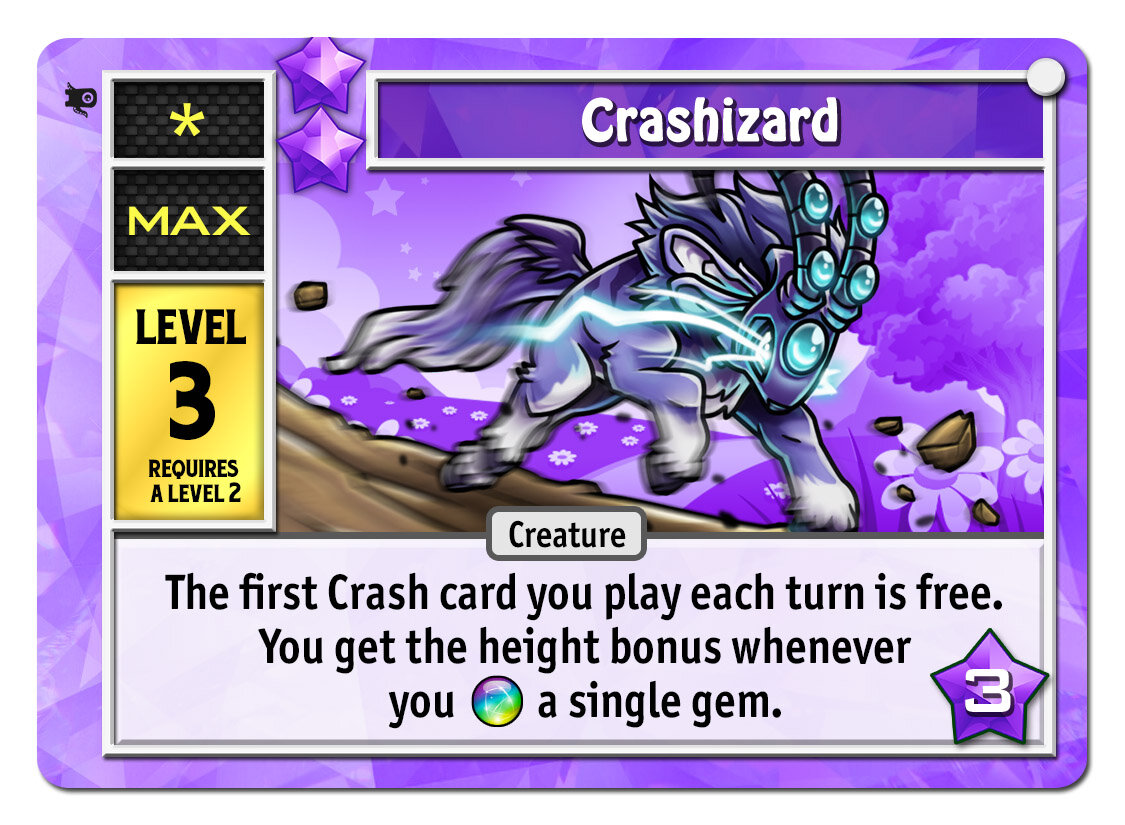
crashizard.jpg
 

Crashizard has the same devastating ability as Crashoban PLUS you also get to pay 0 actions for your first crash gem each turn. That’s super scary for your opponents.

Let’s look at what the other colors’ creatures have to offer. Here are the blue creatures:

blocados.jpg
 
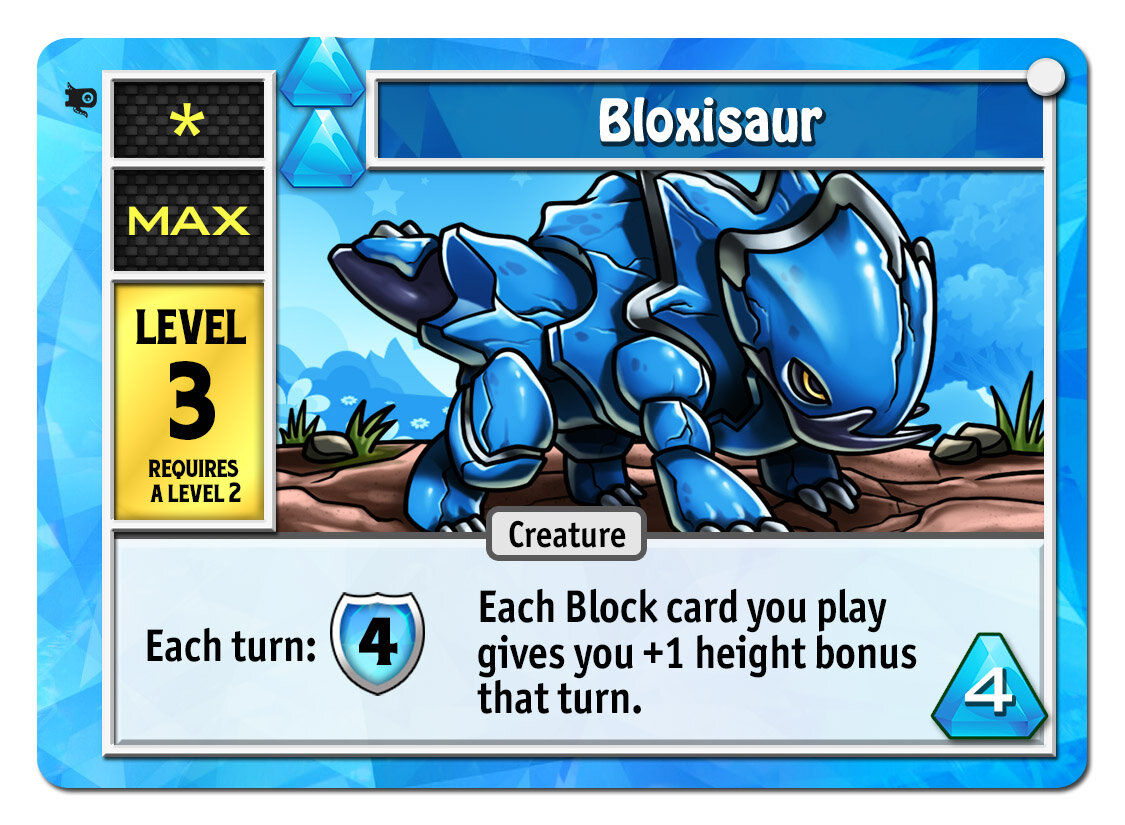
bloxisaur.jpg
 

The blue creatures are very cheap to play. The level 1 creature costs 0 actions and each level up costs only 1 action. These creatures are great defense, helping you stay alive, and then the level 3 creature helps you actually win with his height bonus ability.

The pink creatures are much more expensive:

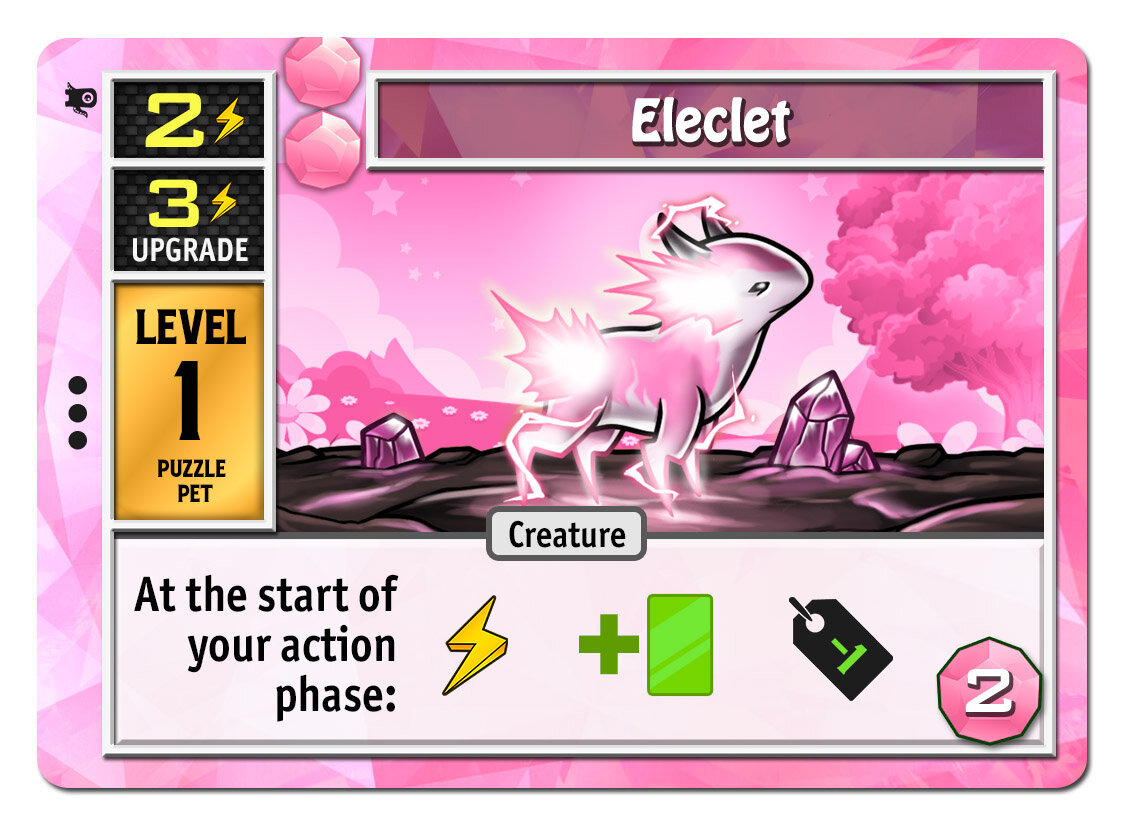
eleclet.jpg
electromox.jpg
 
electromekimus.jpg
 

The level 1 creature costs 2, but it gives you an extra action (among other things) at the start of every subsequent turn. That’s huge. It then costs 3 actions to upgrade, which is a lot, but the extra action from the level 1 creature helps there. Upgrading to level 2 then gives you TWO extra actions per turn, plus some great card draw. If you can get to the level 3 Electromekimus, it’s just ridiculous. When you get 3 extra actions and 3 extra cards per turn, you can do practically anything.

The green creatures are the masters of swaps:

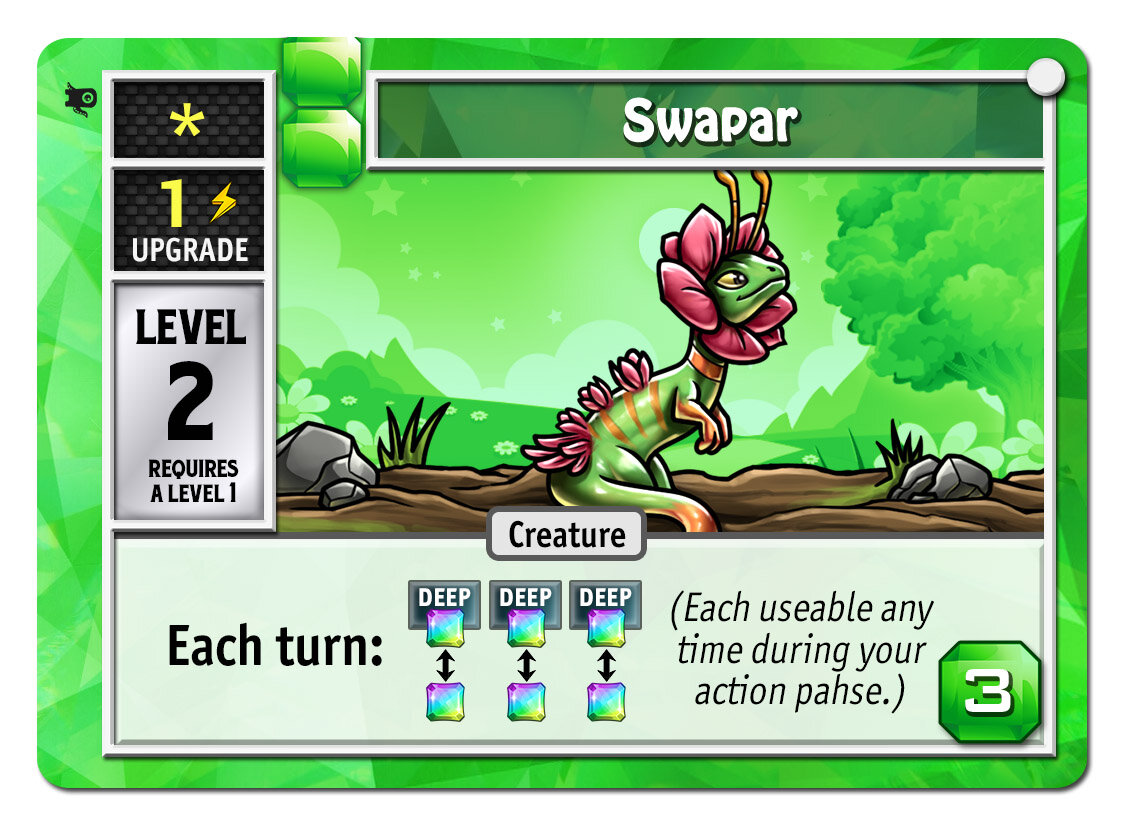
swapar.jpg
 
swapogoyf.jpg
 

Your starting deck comes with a basic swap card that costs 1 action and gives you up to 2 swaps. The level 1 green creature also costs 1 action, but gives you 3 swaps…every single turn! Upgrading to level 2 turns those into deep swaps, which is incredibly powerful (that means you can swap any two gems in your gem pile, not just adjacent ones). The level 3 Swapogoyf has that same ability, plus he lets you trash up to 3 cards in your hand each turn. That lets you slim down to only your most powerful cards.

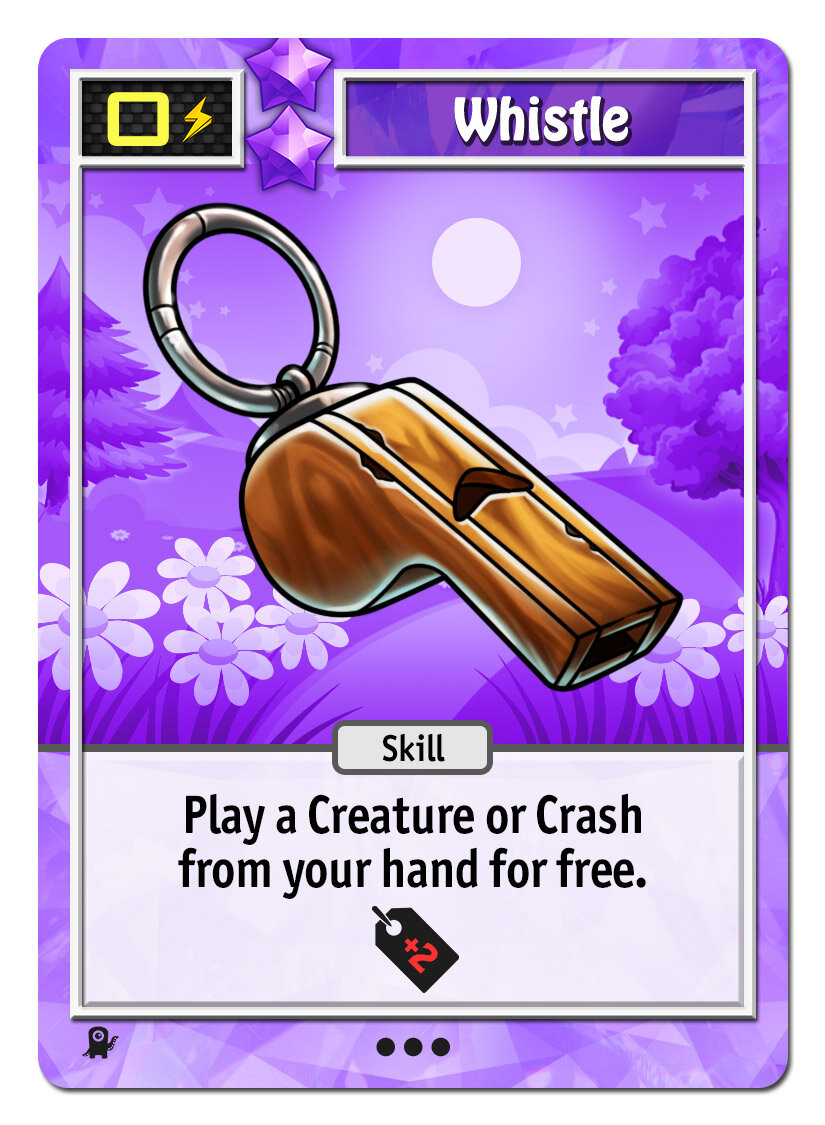
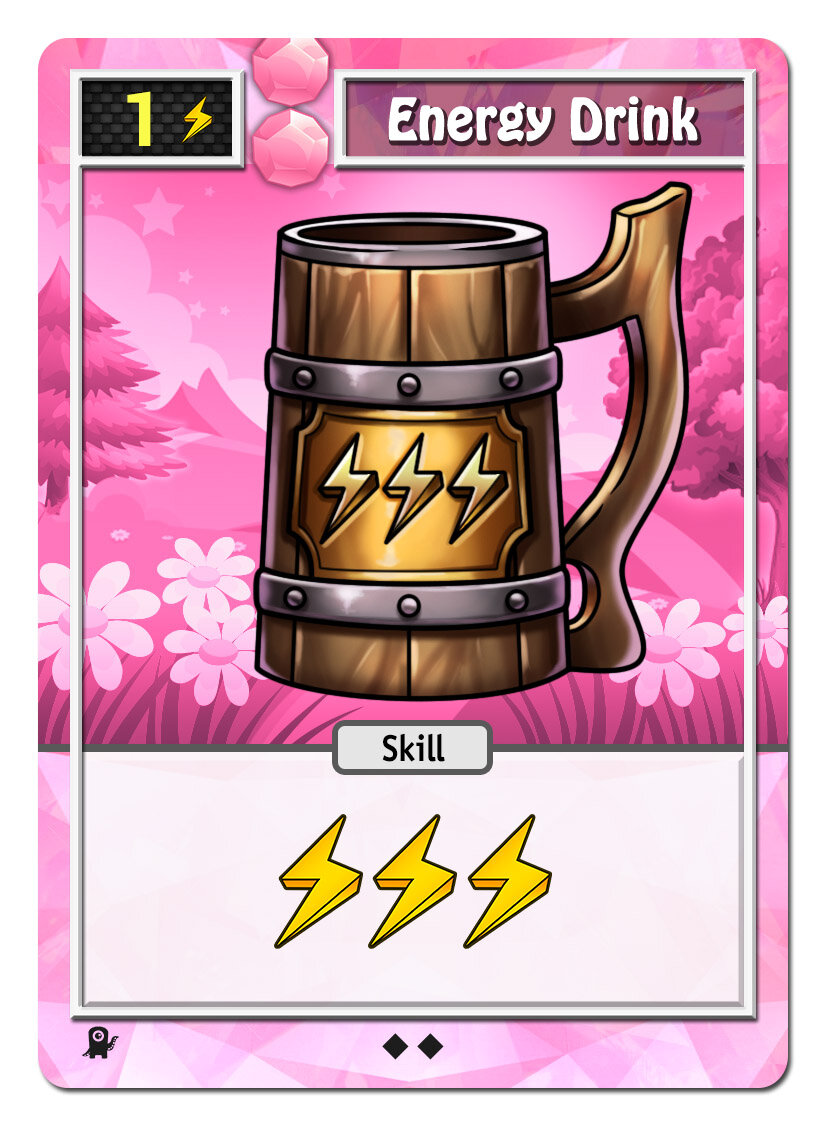
If you need help getting creatures into play, try these:

 
master_wrangler.jpg
 
 
whistle.jpg
energy_drink.jpg
 

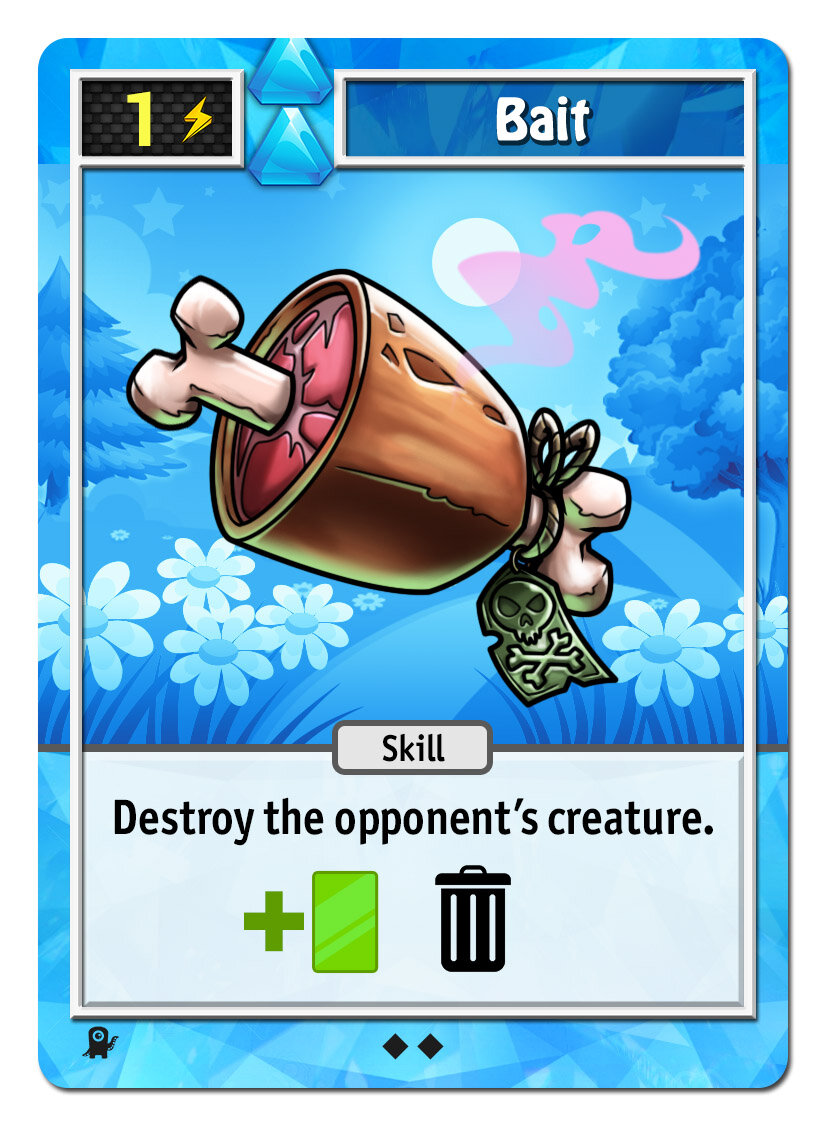
Don’t be afraid to put more than one creature in your deck. You can only have one in play at a time, but they can be destroyed when an opponent crashes the number of colored gems listed on the lower right of your creature card. They might also destroy your creature with this:

 
bait.jpg
 

Anyway, if you have multiple creatures in your deck, this becomes a powerful tool:

 
unleash.jpg
 

Just 1 action for a double crash!

There’s more in Puzzle Pets, but that gives you a good tour of it. Creatures are a somewhat minor mechanic in other decks, so this one is a much different experience. Get a level 3 cutie into play and ride it to victory!

Puzzle Strike 2: Steam Crank deck

Puzzle Strike 2’s expansion, called Bold Adventures, has four new community bank decks as well as 10 more characters. The third of these bank decks is Steam Crank.

 
steamcrank.jpg
 

Steam Crank introduces a new mechanic: the chain combo.

Many cards have a strip at the bottom with a “chain” ability. The chain ability happens if the card you played immediately before it that turn is the same color. For example, if you play any pink card then immediately after that you play the pink card below, then you get ALL the abilities on the card:


The chain ability is always in addition to the main ability on the card, not instead of it. So in the above example, you get to swap up to three times and then, if the card you played immediately before this was pink, you get to use a crash gem.

Here are a bunch more cards that trigger chain combos, to give you a sense of it:

 
loadstone.jpg
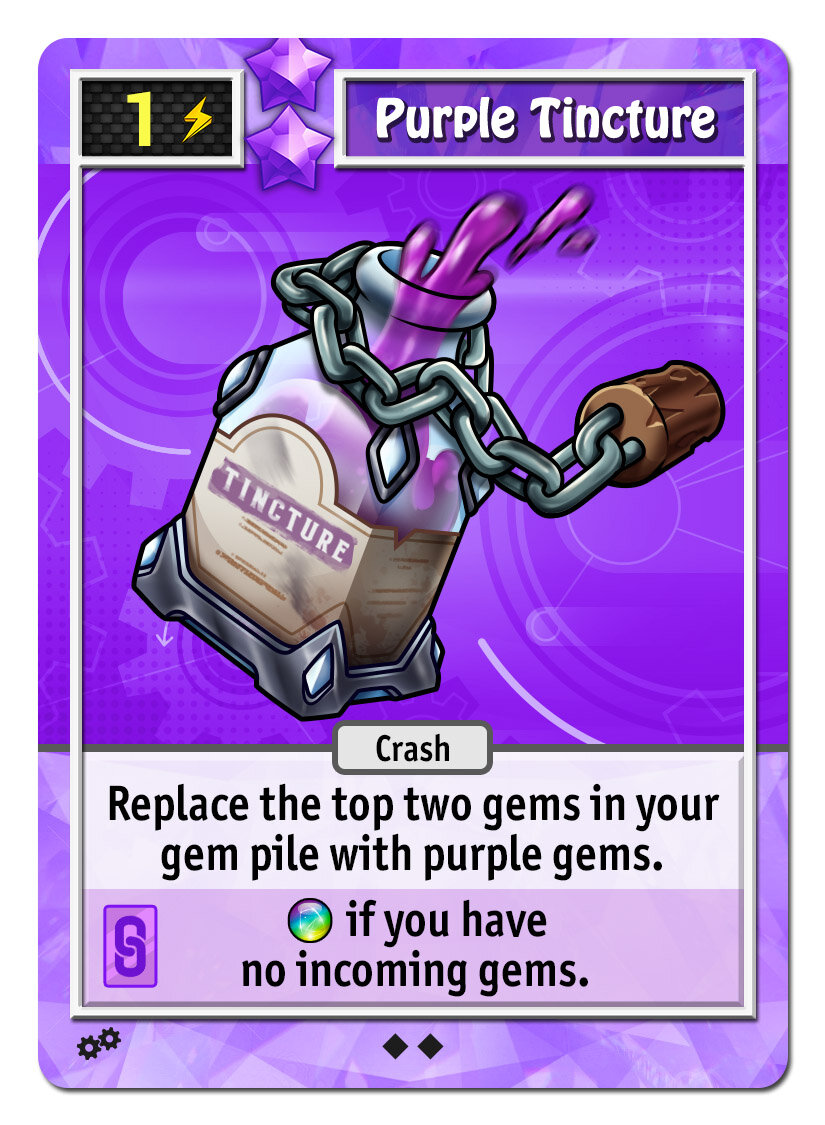
purple_tincture.jpg
clockwork.jpg
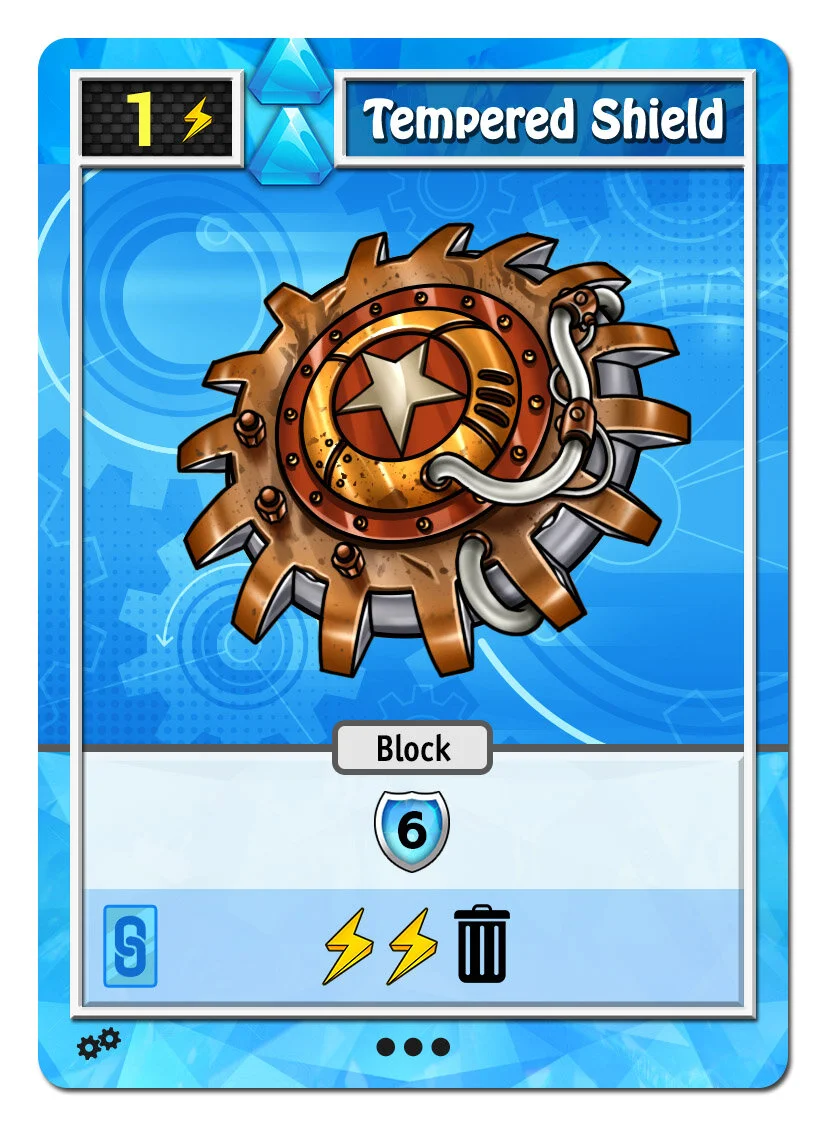
tempered_shield.jpg
rivot_gun.jpg
dynamo.jpg
bell_jar.jpg
 

Because the chain mechanic triggers only on playing consecutive same-color cards, it has an effect on how you build your deck. Getting a lot of cards of a single color is even more powerful than usual because now they can give chain bonuses. That said, there’s still a balancing act. If you have a lot of blue cards, those are good at defense, but you probably need SOME non-blue cards to actually win. If you have a lot of pink cards, those are good for engine-building combos of their own, but you might need at least SOME blue defensive cards, or a green card with swaps, etc. It’s still very possible to trigger chain combos of multiple colors (meaning you play a blue, blue this turn then pink, pink next turn, etc), but you’ll want to think about a few more same-color cards than you usually draft.

That said, you could always branch out with Bejeweled Corset:

 
bejeweled_corset.jpg
 

Now you can trigger any card’s chain combo without even needing to worry about colors!

The Steam Crank deck has another minor mechanic as well. It comes from these cards:

 
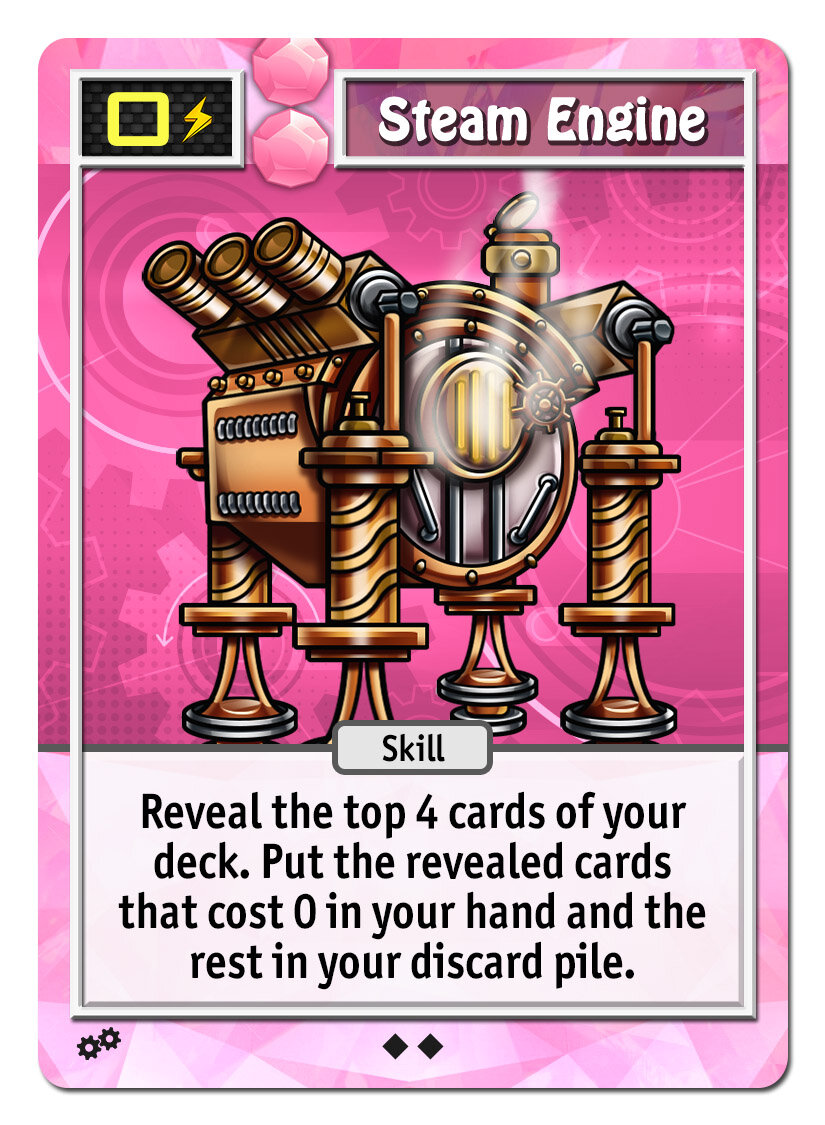
steam_engine.jpg
 

Steam Engine puts more cards in your hand, but only if they’re 0-cost cards. Note that Steam Engine itself costs 0, so if you have both copies of it in your deck, one copy could give the next (which you could then play again, since it costs 0).

Turn the Crank, on the other hand, costs 1. But it doesn’t look at just the top 4 cards of your deck—it immediately gives you ALL the 0-cost cards in your discard. This is incredibly powerful. It might return a lot of cards, which you can all instantly play (because they cost 0). Though you can’t use Turn the Crank to replay 0-cost cards you already played that same turn (because played cards don’t actually go to the discard until the end of your action phase), you can still replay all the 0-cost cards in your discard pile from previous turns.

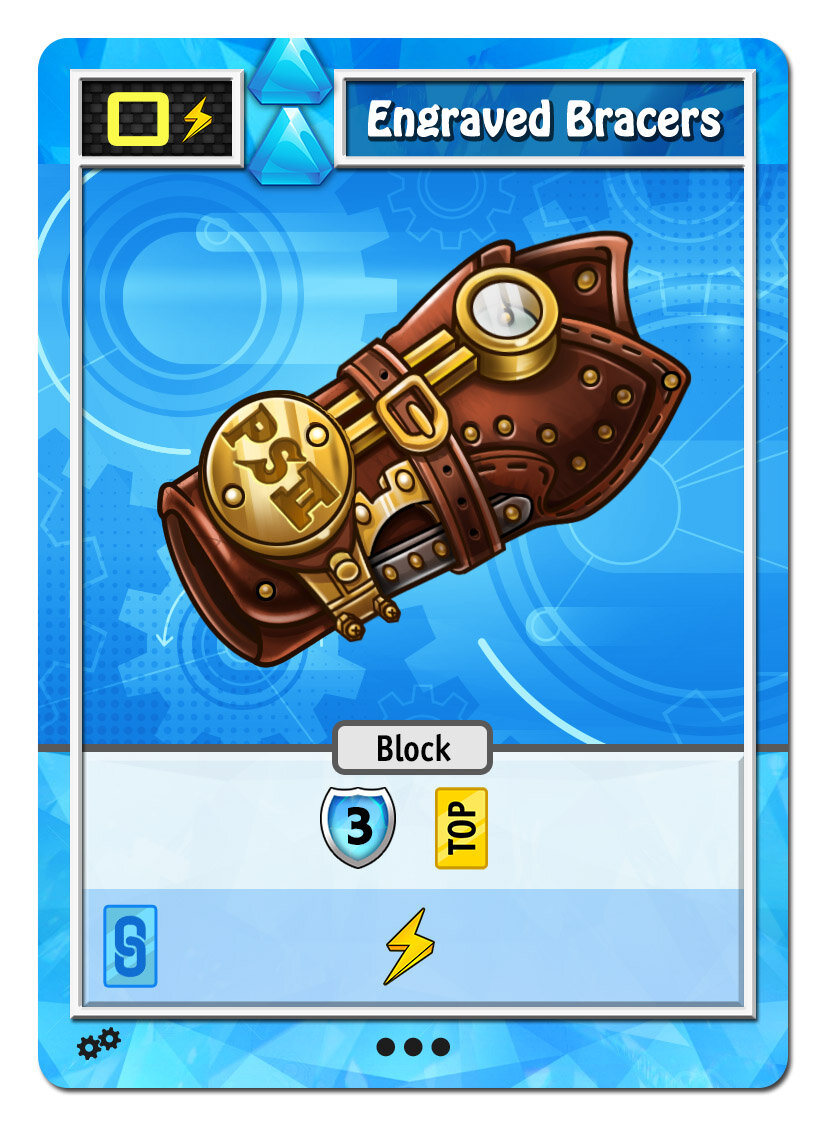
Are there really many 0-cost cards though? There sure are, the deck has loads of them:

 
engraved_bracers.jpg
ornate_amulet.jpg
acid_spill.jpg
artifice_crank.jpg
over-embelish.jpg
steam_engine.jpg
sextant.jpg
 

When you have a bunch of 0-cost cards, card draw becomes even better. It normally does not make sense to spend your last action of the turn on something that draw cards, but if you are likely to draw things that cost 0 to play, then go ahead! Research Notes comes to mind:

 
research_notes.jpg
 

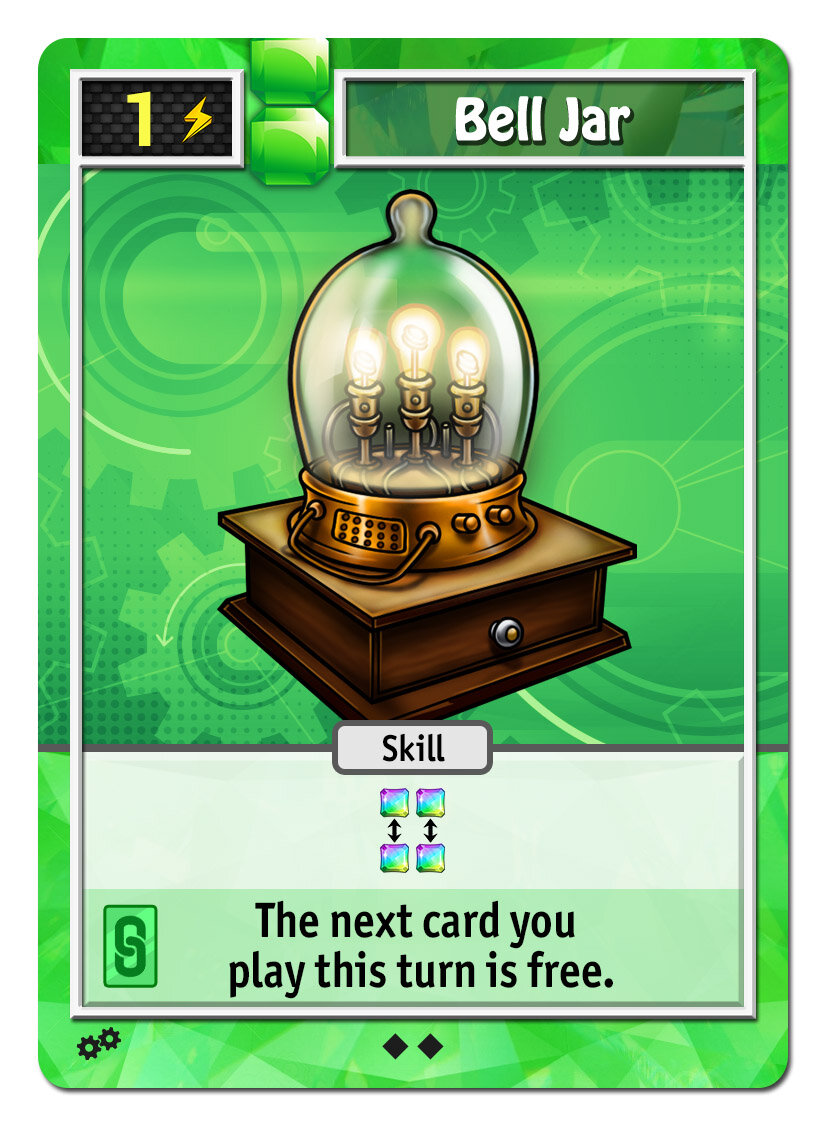
Do you see the connection between this 0-cost mechanic and the chain combo mechanic? The abundance of 0-cost cards in all colors makes it a lot easier to trigger those chain combos, and to trigger longer chains. For example, if you had Acid Flask and Bell Jar in your hand (shown at the start of this post), could you trigger BOTH chain combo bonuses? The answer is no unless you have a third green card to start off the sequence of greens. If you had a 0-cost green card such as Research Notes in your hand though, then you really could play Acid Flask for its main and chain ability, then Bell Jar for it’s main and chain ability.

Steam Crank is an engine builder’s dream, so see what you can do with it!

Puzzle Strike 2: Ten Expansion Characters

Puzzle Strike 2’s expansion, called Bold Adventures, has four new community bank decks as well as 10 more characters. Each character has three cards and you start with those in your deck. Each character has different strengths, so they push you in different directions when building the rest of your deck.

To give you a taste of these characters, here’s just one card from each of them.

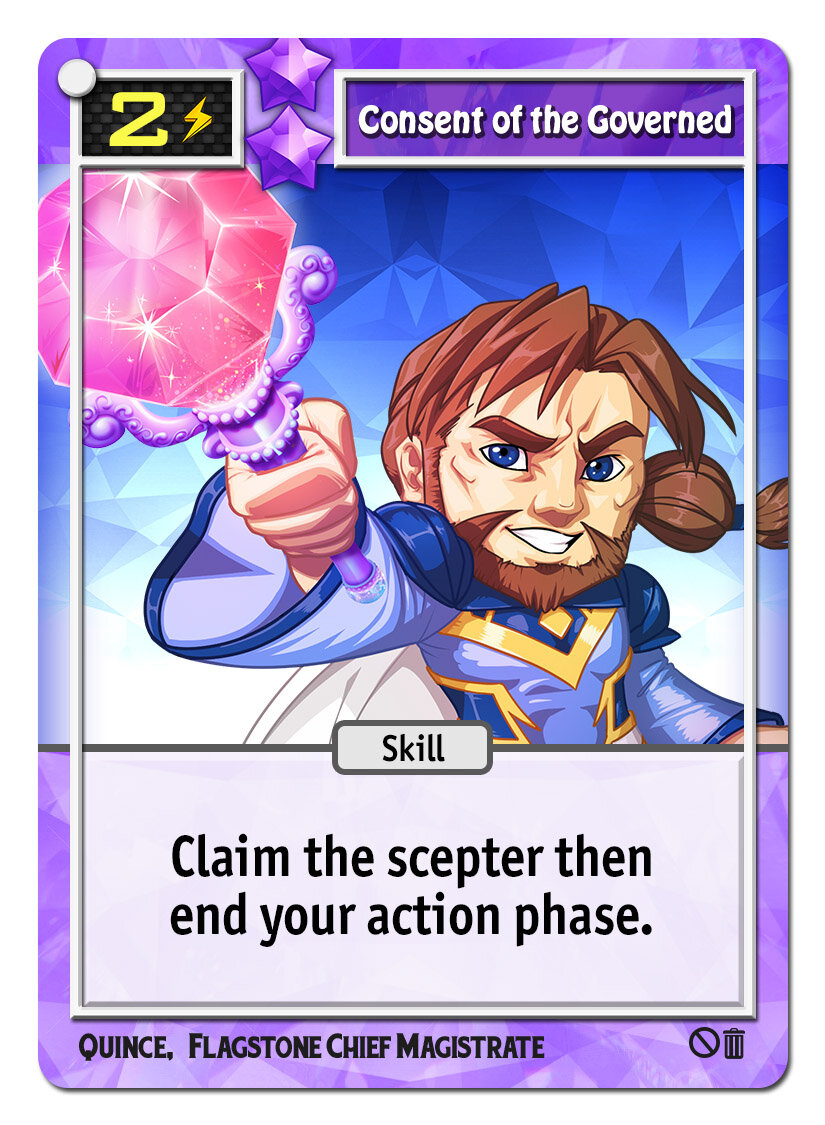
Quince, Flagstone Chief Magistrate

 
quince_1.jpg
 

Quince, as the rightful ruler of Flagstone, can claim the scepter at any time! The player with the scepter has the bonus that they fill their super meters up automatically as each player takes their turn, but the drawback is that everyone attacks the scepter holder and the scepter holder cannot block incoming gems. This card lets Quince steal the scepter at opportune times, which is not something any other character in the game can do.


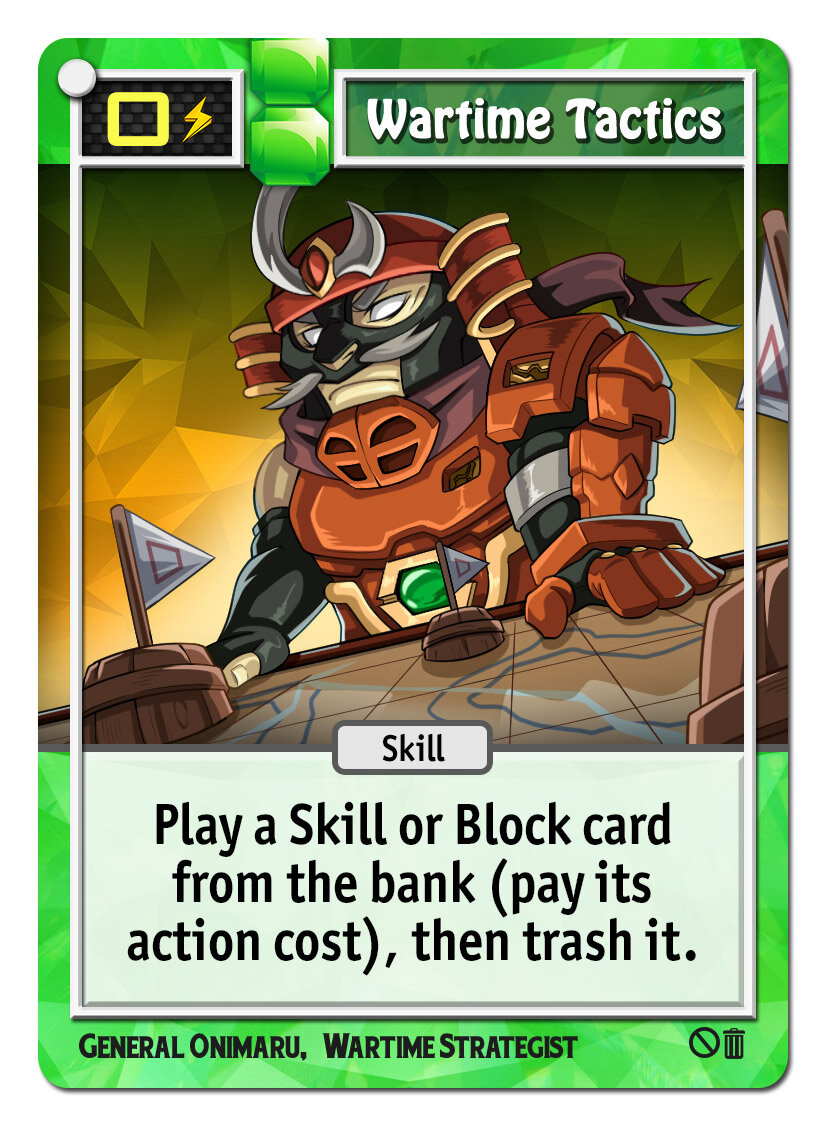
General Onimaru, Wartime Strategist


Wartime Tactics is possibly the most versatile card in the game. Onimaru is able to play a card from the bank without having to add that card to his deck first, then wait to draw it. This gives him access to powerful effects before anyone else, and it also lets him rearrange the drop pattern colors in the bank a little as a side effect.


Bigby, Flagstone Judge


Bigby’s Sovereign Immunity is an incredible way to avoid losing. You have to have 10 or fewer gems when you end your action phase to avoid losing…unless you’re Bigby. This card will destroy all your blue gems, while probably puts you under the limit. Surviving just one more turn than usual in Puzzle Strike 2 is a big deal and can put you in a position to win soon after.


Bal-Bas-Beta, Clockwork Guardian

 
bbb_2.jpg
 

Cog Engine lets you play a powerful card two turns in a row. It costs 1 extra action to do that…unless it’s a pink card, then it’s free! Pink cards are often suited to engine-building (allowing you to draw a lot, play a lot, do big combos somehow), and that’s BBB’s strong suit. He even has another character card that can put two pink cards from the bank on top of his deck which helps Cog Engine be even stronger.

Menelker, Deathstrike Dragon


Who needs swaps? Even if your purple gems aren’t all in a row, you can crash ALL of them at once with this. That’s powerful itself, but consider that doing this probably results in the rest of your gems having more same-color runs, allowing your next crashes to be more potent.


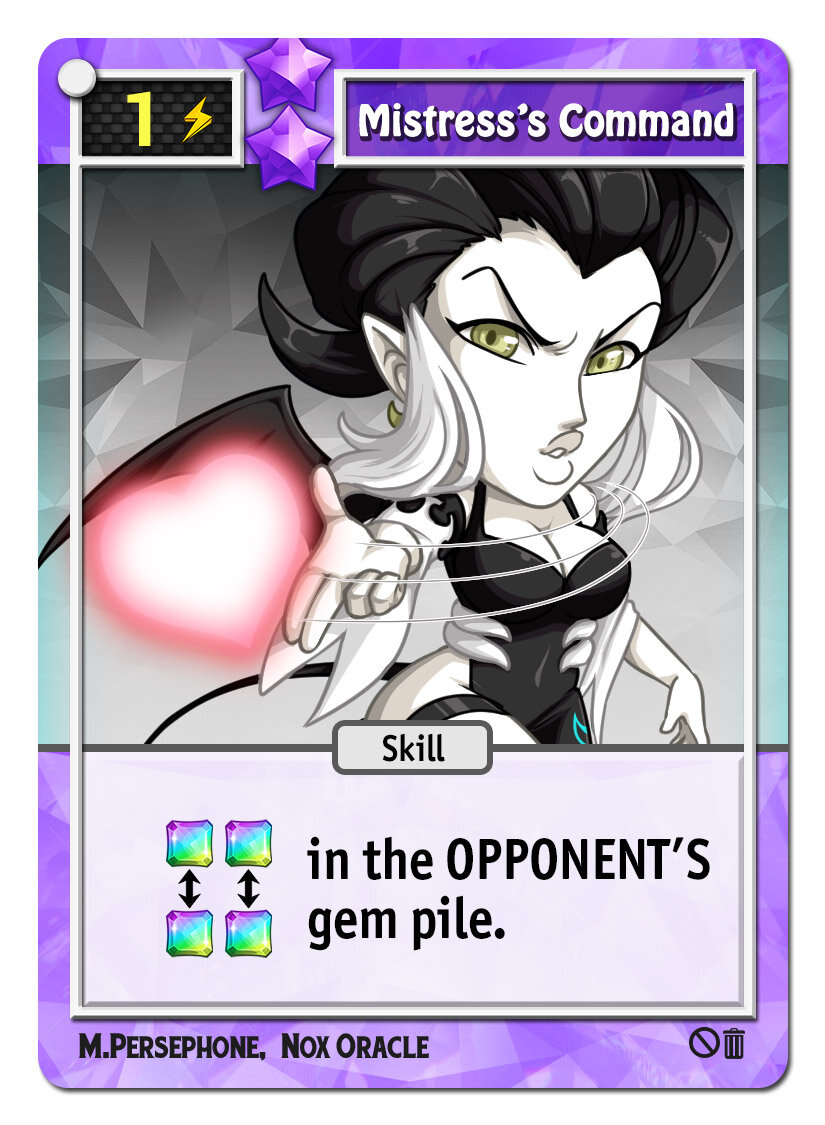
M.Persephone, Nox Oracle


Nothing in the game can directly mess with an opponent’s gem pile except for this. Persephone’s ability to control others extends right into their gem piles.


Gloria, Hopeful Healer

 
gloria_1.jpg
 

Gloria can affect other players too, but not by screwing up their gem pile. Quite the opposite! She destroys all 0-cost cards from everyone’s discard piles. This has the effect “healing all wounds” because wound cards (useless, blank cards) are 0-cost. But there are lots of non-wound cards that are also 0-cost, so she counters strategies that rely on those cards. She also gets the perk of retrieving one of her own cards from her discard pile. That lets her play a powerful card sooner than usual, or pick just the right kind of card (a block for example) if she needs defense to survive.


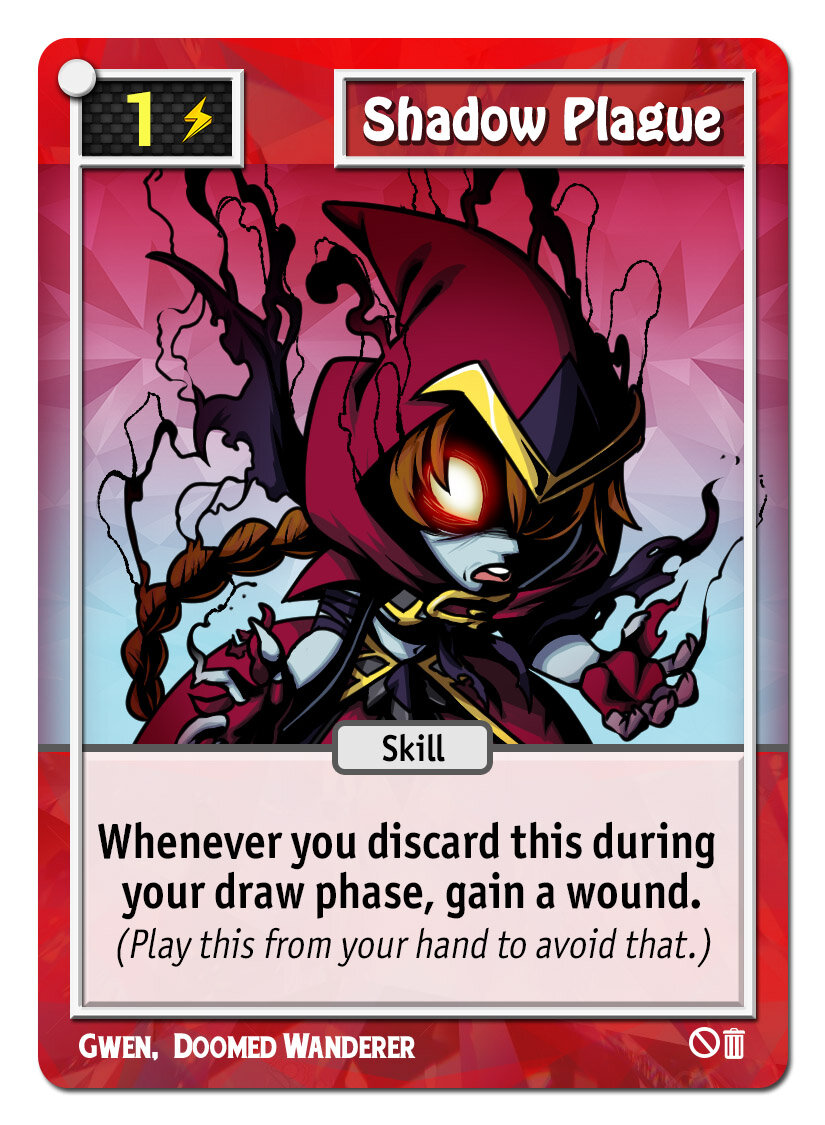
Gwen, Doomed Wanderer


Shadow Plague is unique in that its the only card in the entire game (other than wounds) that is a color other than the four main colors. It’s red! It’s doubly unique in that it’s the only purely negative card to have. It fills your OWN deck up with wounds unless you waste an action on stopping it from giving you a wound. Why would you want this card, you ask? You don’t. It’s purely negative and represents Gwen’s descent into becoming undead. To make up for it, her other cards are very strong and offer more card draw and actions than a character would normally be allowed.


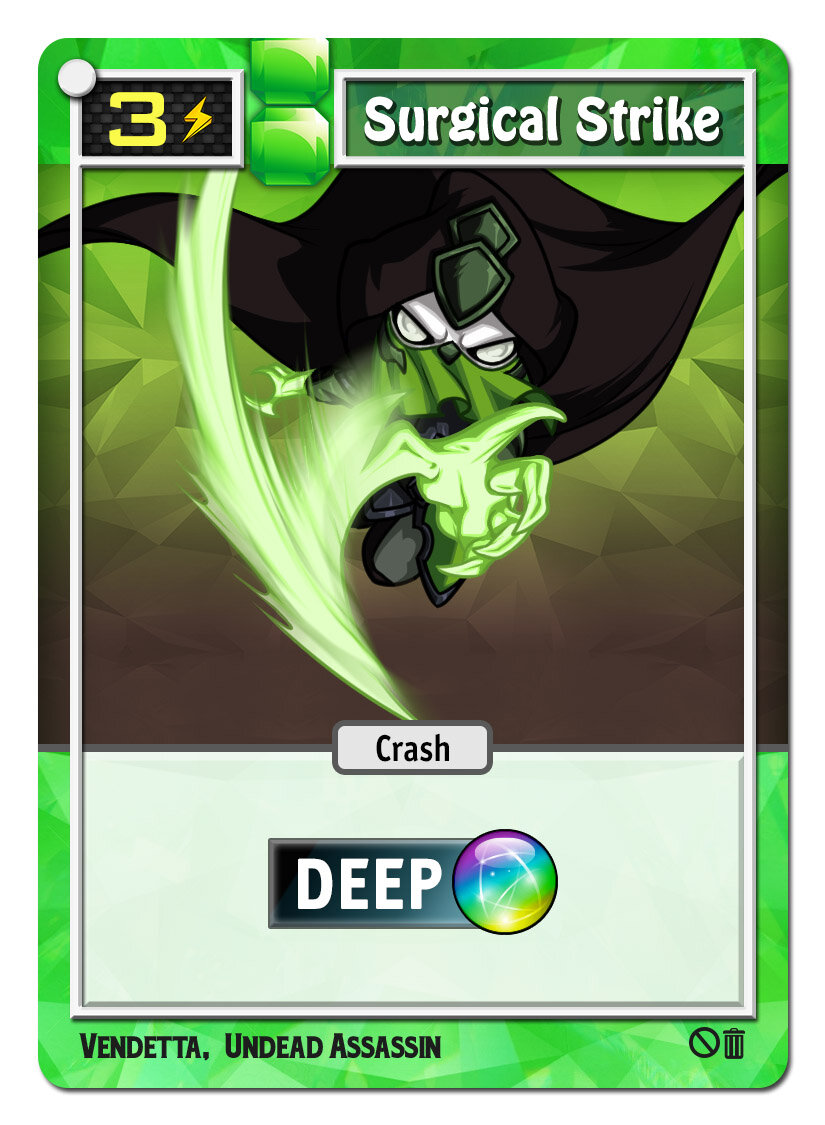
Vendetta, Undead Assassin

 
vendetta_1.jpg
 

Deep crashes are in short supply in Puzzle Strike 2. (Those let you crash any gem in your gem pile, not just the top one.) This simple and powerful card is just the kind of thing Vendetta patiently waits for until he has an opportunity to strike.


Zane, Bloodguard Anarchist


Zane has some wacky things going on. This isn’t his strongest card, but it gives you an idea of his pranks. For 0 actions, he gets a random card from the bank (which are better than starting deck cards, so it probably helps him) but the opponent gets some bad card. It’s hard to say exactly what type of card, if any, will be in the trash pile, because there are a lot of different effects that put cards there. Chances are it will be a wound or a starting deck card. Something bad. While this effect is minor, it’s annoying that Zane can do this every few turns at basically no cost to him. That said…what you should really be worried about are his other cards, which you can look up on your own.

There’s more to all these characters, but that should give you a good idea of their variety and how they all push you to play in different ways.

Puzzle Strike 2: Dinosize deck

Puzzle Strike 2’s expansion, called Bold Adventures, has four new community bank decks as well as 10 more characters. The second of these bank decks is Dinosize.

 
dinosize2.jpg
 

Dinosize is home to big effects. Ridiculously big effects. Let’s start off with a BANG:


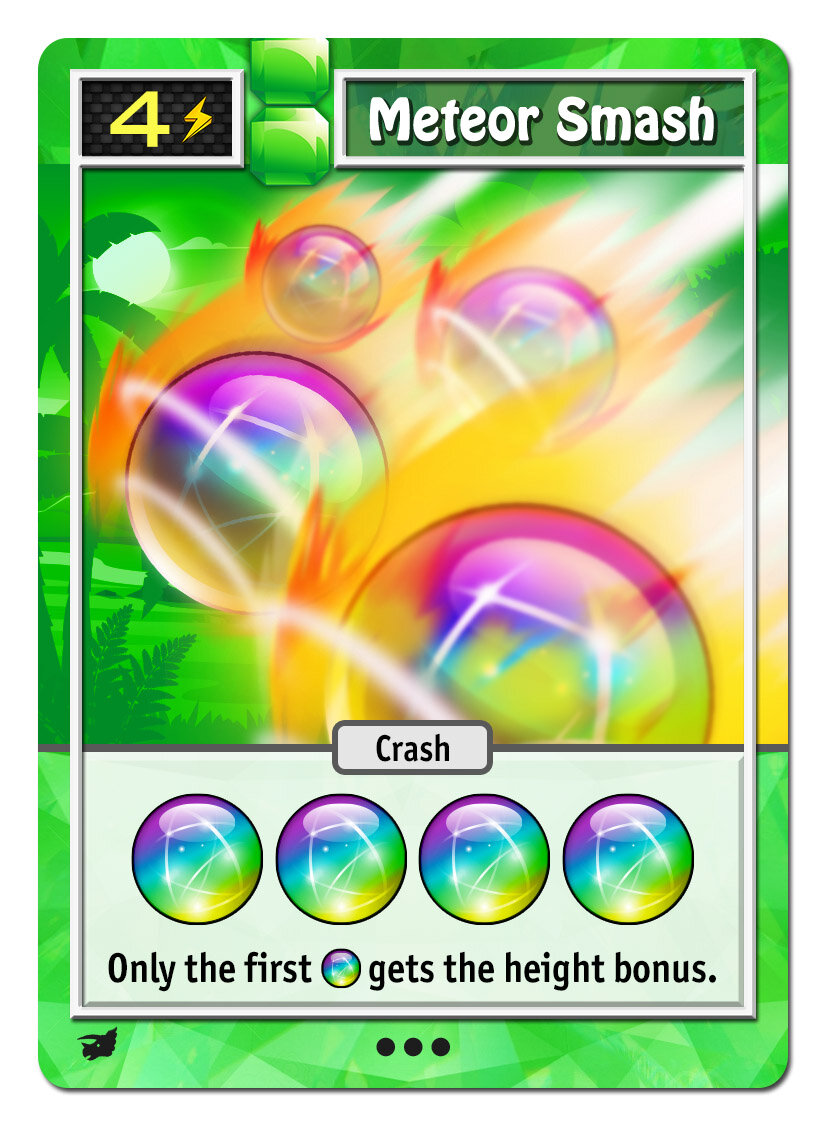
Holy moley! A quadruple crash is absurdly powerful. The cost looks prohibitive though. You only get 3 actions per turn by default, though some cards and characters can occasionally give extra actions. When you reach the first and then second “ante up” phase of the game, you get 4 then 5 actions per turn. But still, it’s very hard to afford cards that cost 4.

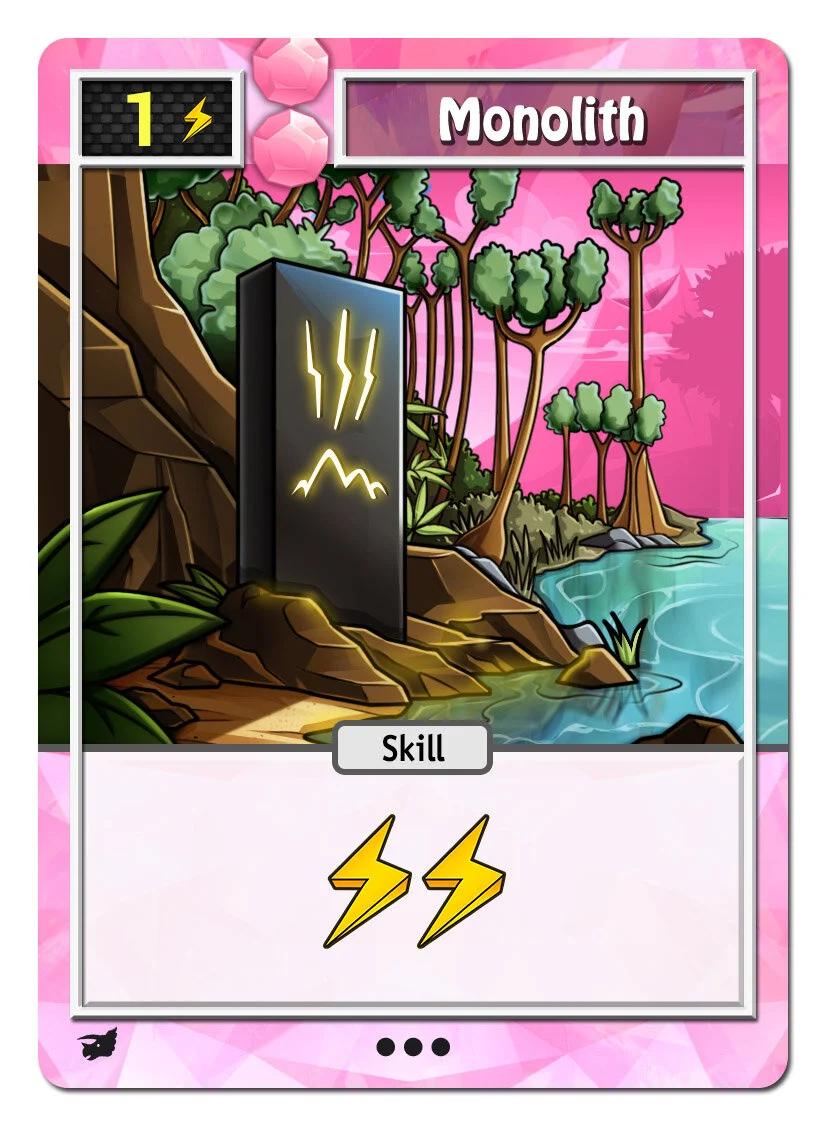
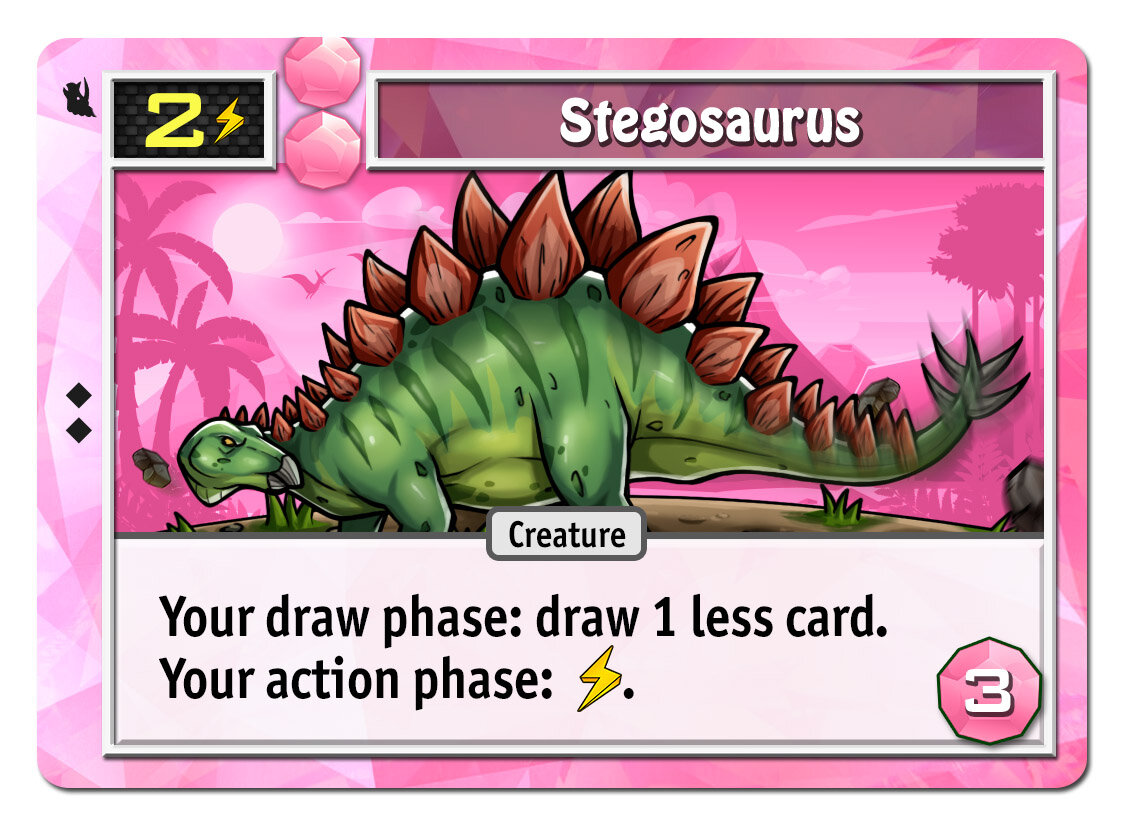
That’s why Dinosize gives you cards that give extra actions so you can afford huge effects like Meteor Smash.

 
monolith.jpg
old_bones.jpg
 
 
beast_frenzy.jpg
 
stegosaurus.jpg

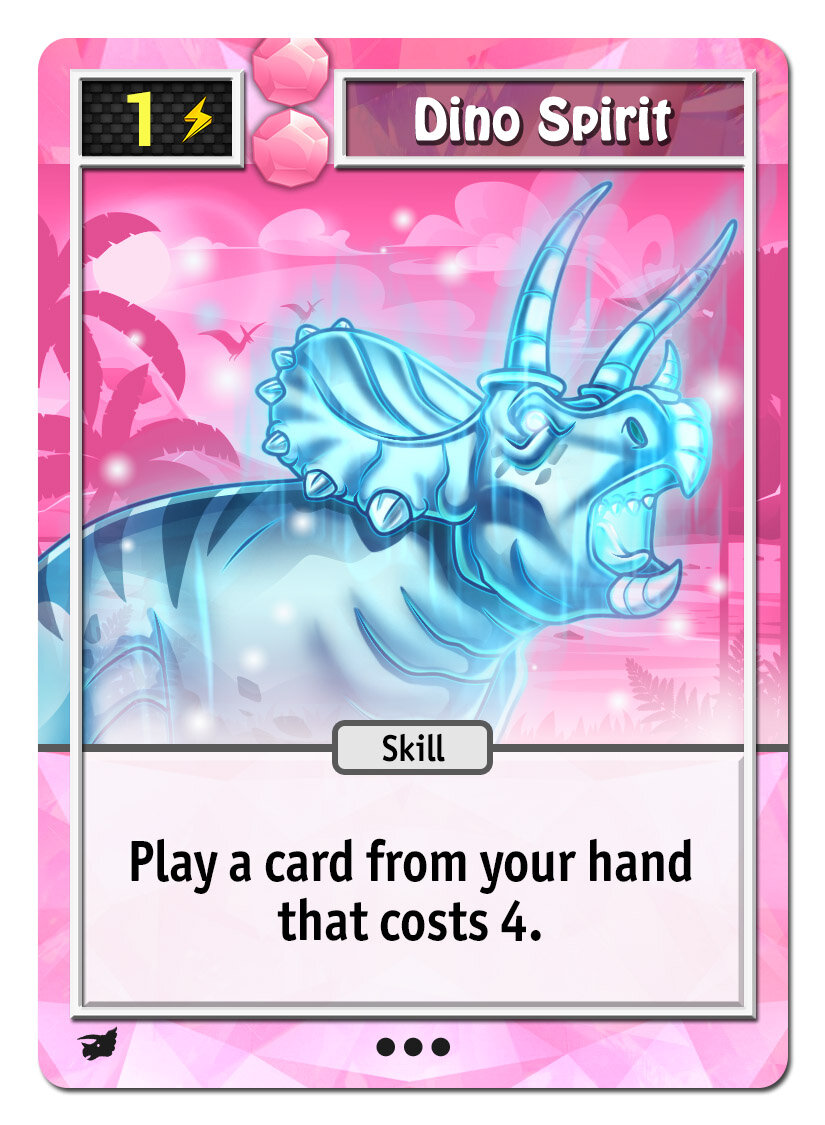
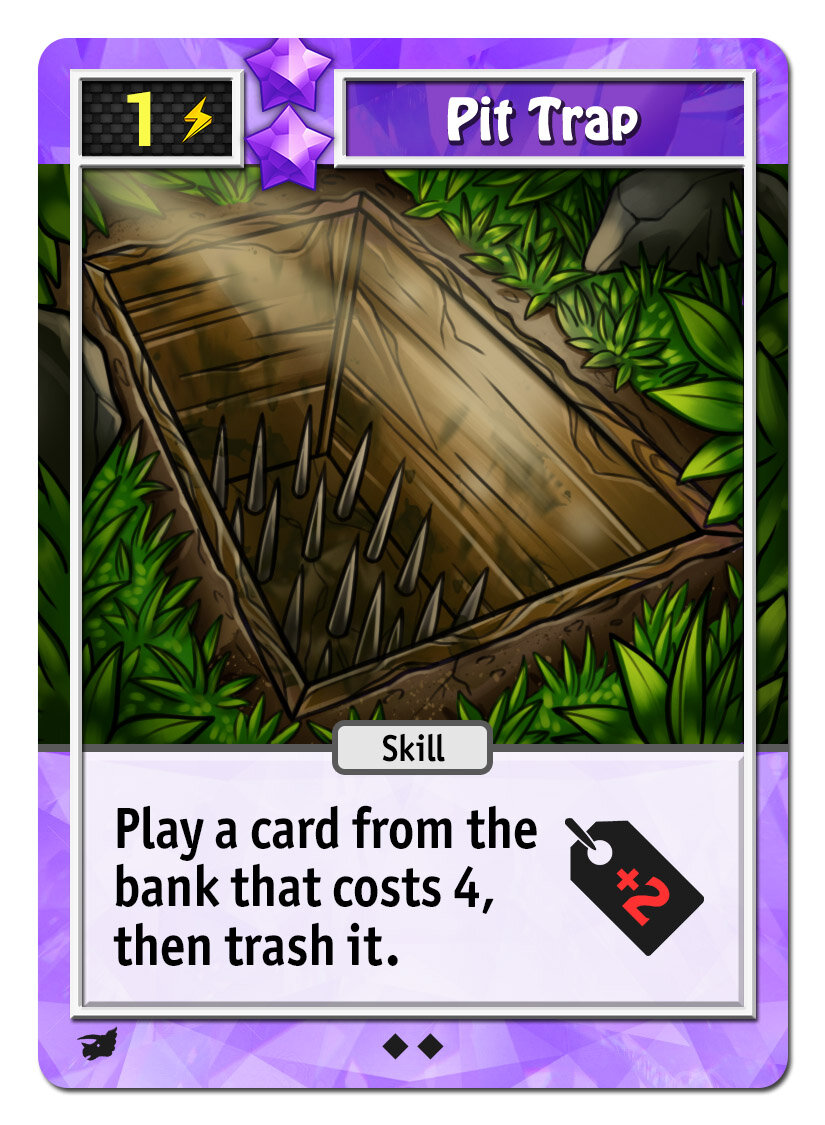
Some cards explicitly let you play 4-cost cards for free:

dino_spirit.jpg
pit_trap.jpg

What else can 4-action cards do? Check out this juggernaut:

 
jurassic_crash.jpg
 

How about a double deep crash and a double deep swap?!

Why bother lining up your gems of a given color? Just crash all gems of a color no matter how jumbled up they are:

 
mass_extinction.jpg
 

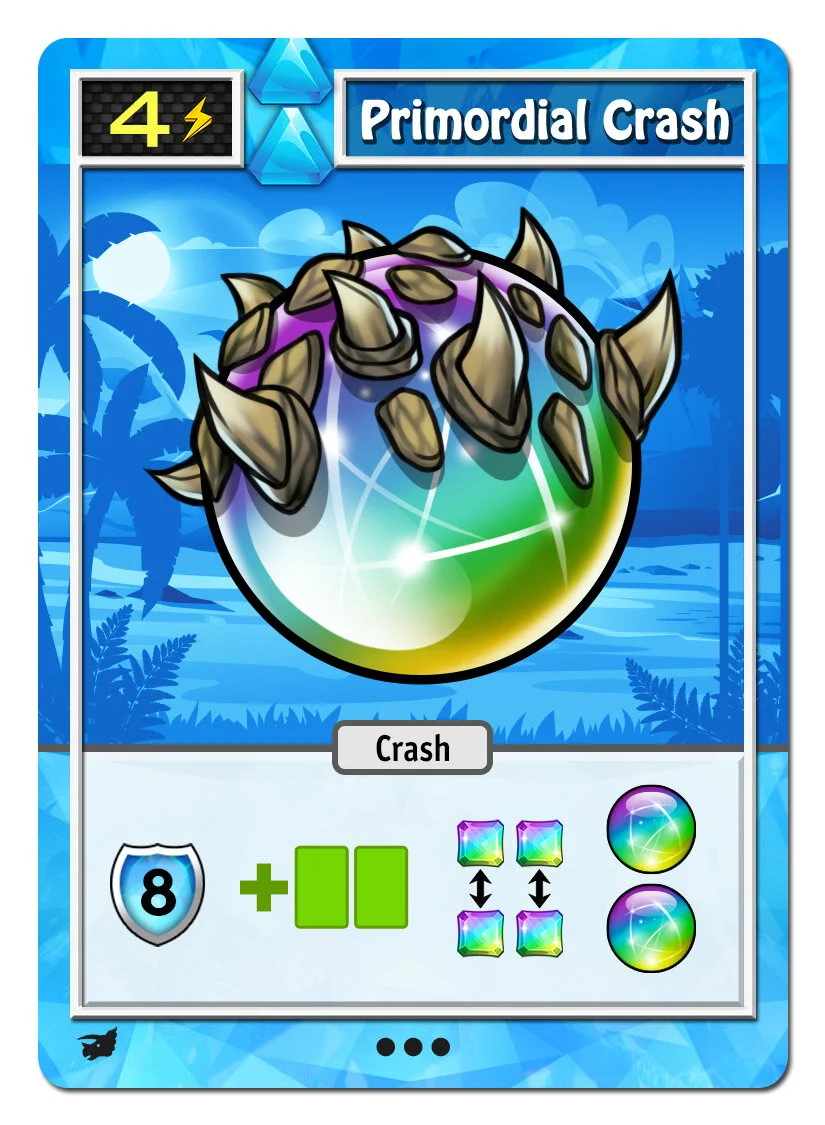
Need some defense? How about these:

 
primordial_crash.jpg
 

Maybe blocking 99 and destroying a bunch of gems is enough? Why not have two free actions while you’re at it. Or use Primordial Crash and do your offense, defense, engine, and gem pile manipulation all on the same card.

For a different spin, look at Stalk the Prey:


If you can afford it…it becomes free. Get your 4 actions back (to play some other insane card) and have some swaps and a crash gem while you’re at it.
You won’t find more powerful effects in any other deck. Dinosize truly pushes the limits of the game, and you will honestly wonder if broken things are going on. No other deck will leave you wondering “what just happened?!” than Dinosize. It’s quite a ride.
For some more craziness, check out these two cards:

 
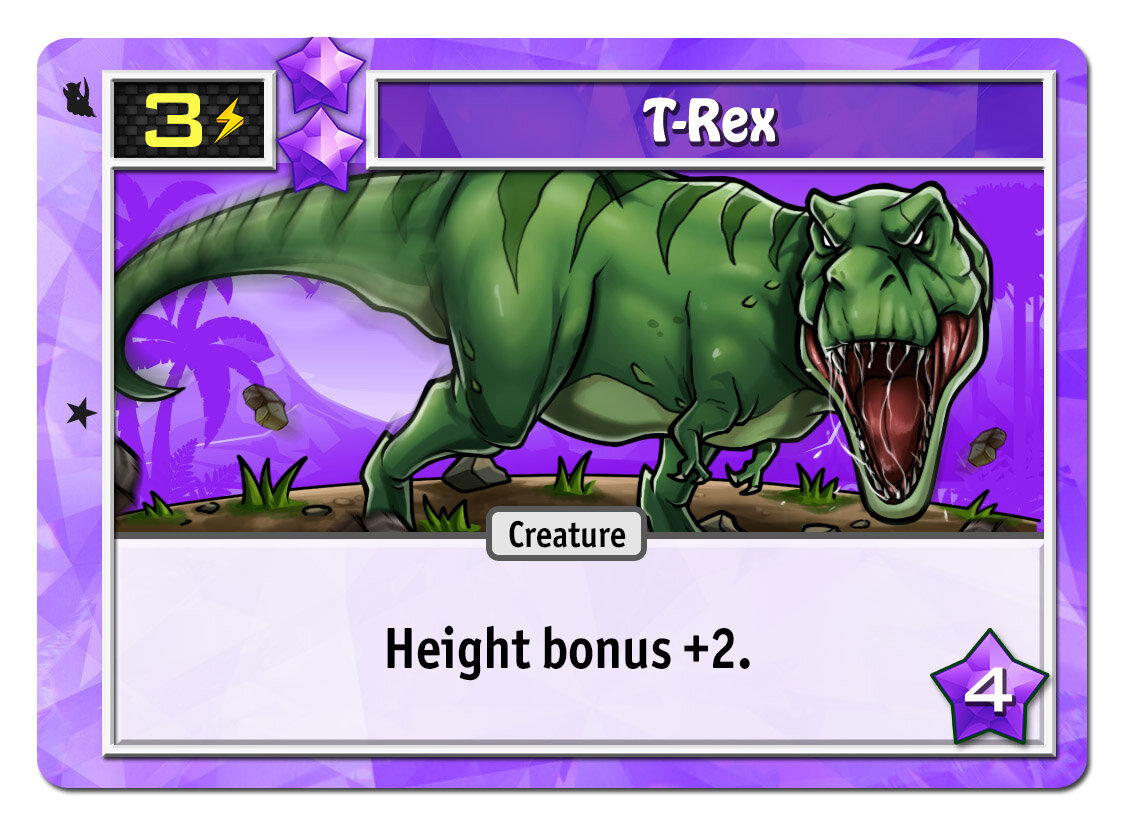
enrage.jpg
 
t_rex.jpg

Enrage adds three gems to your gem pile…which are all the same color…and which are probably the same as the gems you just anted at the start of the turn. It’s setting you up for a massively powerful crash, that will also, by the way, trigger one of your super moves because it’s just so many gems. If you happen to have T-Rex, pile on even more damage you’re heaping out every time you crash more than a single gem.

And speaking of your super meters, how about this jackpot?


The 3 action cost would normally be steep, but it’s very doable with the assistance of other cards in this deck. The crash is worth maybe two of those actions, but the super meter gain is enormous. You have four super meters and that’s adding a gem to each, which can trigger multiple of them to go off. Play that a few times (especially if you are holding The Scepter of Power, which ALSO adds a gem to all your super meters) and you’re poised for a chain reaction of insanity that you will remember for a long time.

Puzzle Strike 2 is generally a system that creates the opportunity of miracle turns and comebacks. Dinosize pushes that so far that you might, if anything, feel overwhelmed by the power of these huge effects and the insane situations they create. Dinosized indeed!

Puzzle Strike 2: Haunted House deck

Puzzle Strike 2’s expansion, called Bold Adventures, has four new community bank decks as well as 10 more characters. The first of these bank decks is Haunted House.

 
haunted_house2.jpg
 

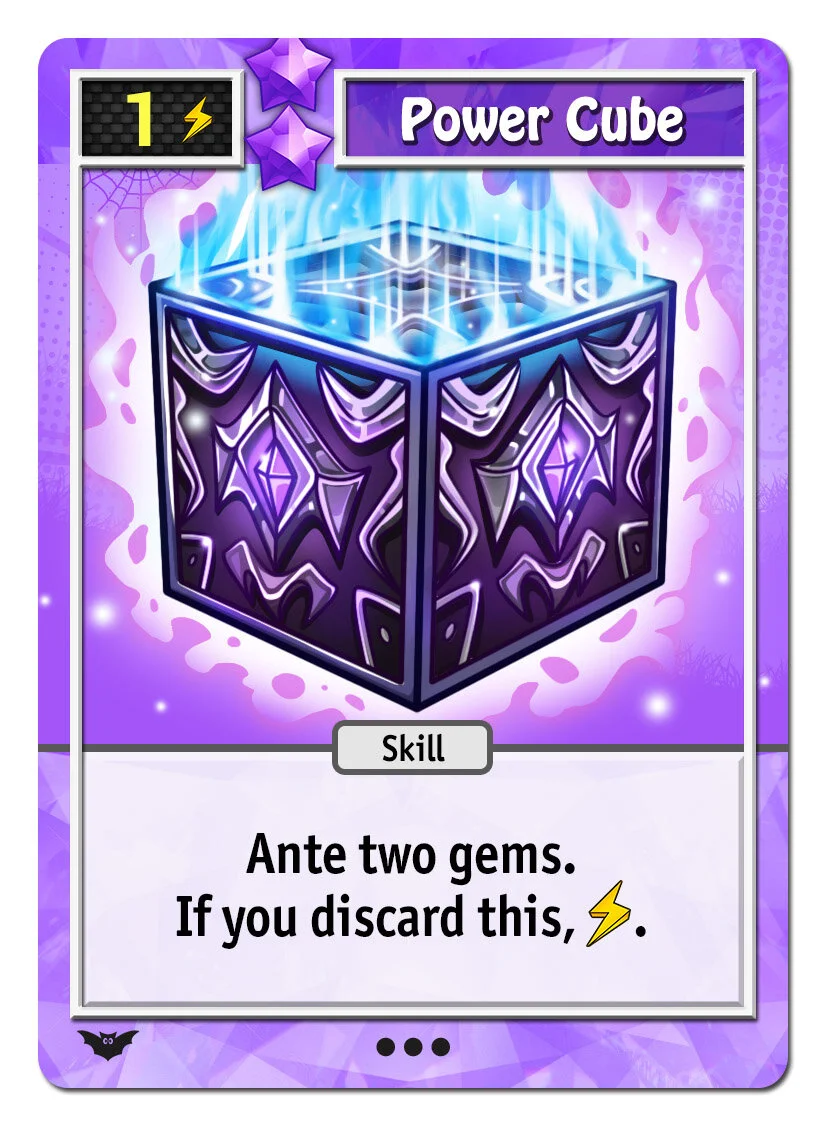
Discarding cards is generally bad to do, but Haunted House turns that on its head. It’s full of cards that do things when you discard them, like these:

 
gravestone.jpg
strange_runes.jpg
power_cube.jpg
werewolf_claw.jpg
 

All four of these cards are reasonably powerful on their own, without any special discarding going on. In that case Gravestone is like the block in your starting deck, except it costs 0 actions instead of 1. Power Cube having you ante two gems (which is likely to give you a run of 4 same-color gems or more!) or Strange Runes filling your super meter are each worth the cost of 1 action most of the time. Werewolf Claw letting you crash for 1 action rather than 2 like your basic crash gem is a huge bargain, and the drawback of adding a wound to your deck will only matter if the game goes long.

But now consider that with Strange Runes and Werewolf Claw, you can get those effects, plus more bonuses, if you can find a way to discard those cards during your turn! Gravestone and Power Cube are worded differently, so if you discard them you won’t get to block 3 or ante two gems, but you will get their discard effects for free (destroying your top gem with Gravestone and +1 action from Power Cube).

How do you discard cards during your turn? Note that none of these effects trigger when you discard your hand and redraw it during the draw phase. You need a way to discard cards during your action phase to trigger these things. The following are some easy ways:

 
thornweave_doll.jpg
coffin.jpg
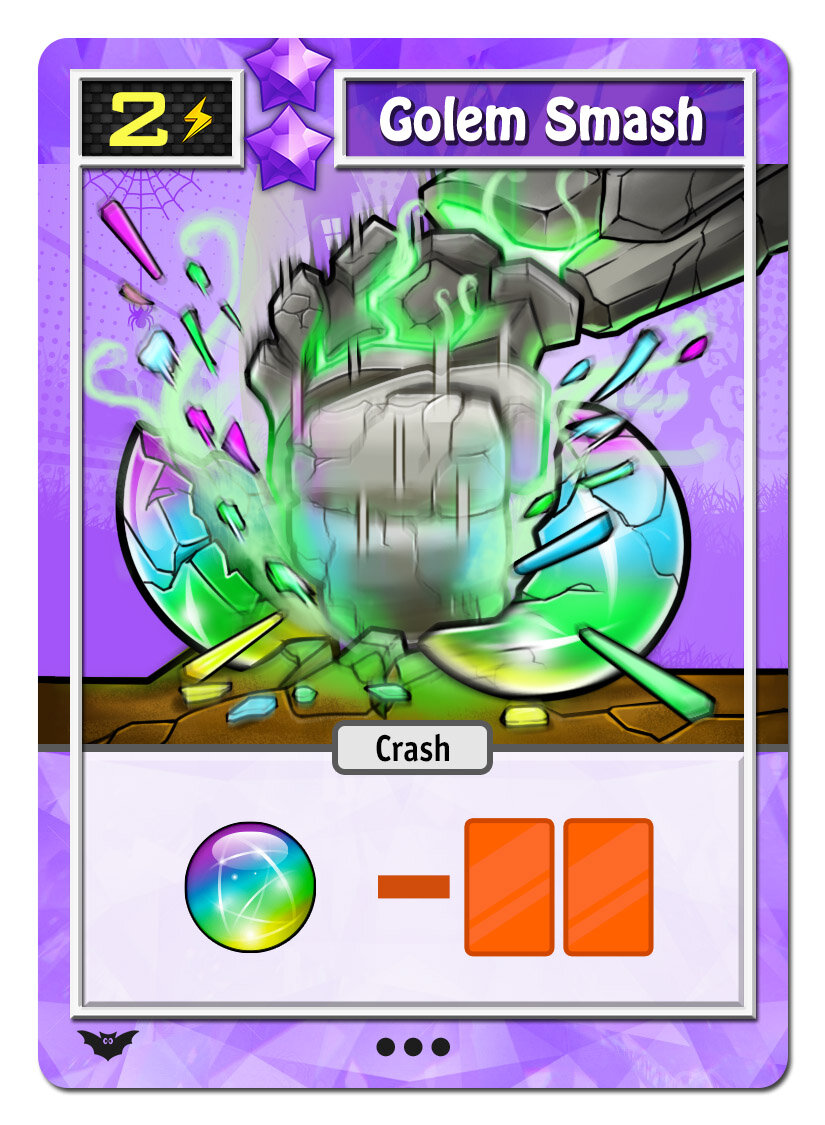
golem_smash.jpg
 

The cards above are a reasonable power level. Not especially strong or weak on their own. Golem Smash is the weakest in that it’s the same as your basic starting crash gem, except it has a drawback of discarding two cards, yet crash gems are so important to add to your deck that you might add it anyway even regardless of any discard mechanics.

But now factor in those discard mechanics! If you can combo any of the above cards with discarding any of the previous set, you’re getting away with quite a lot. If you play Golem Smash, then discard Power Cube and Werewolf Claw to it, for example, you’ll get to:

Crash (from Golem Smash), Gain 1 action (from discarding Power Cube), Crash again and gain a wound (from Werewolf Claw). In other words, you’ll end up crashing twice yet only having 1 fewer action than when you started. Quite a bargain!

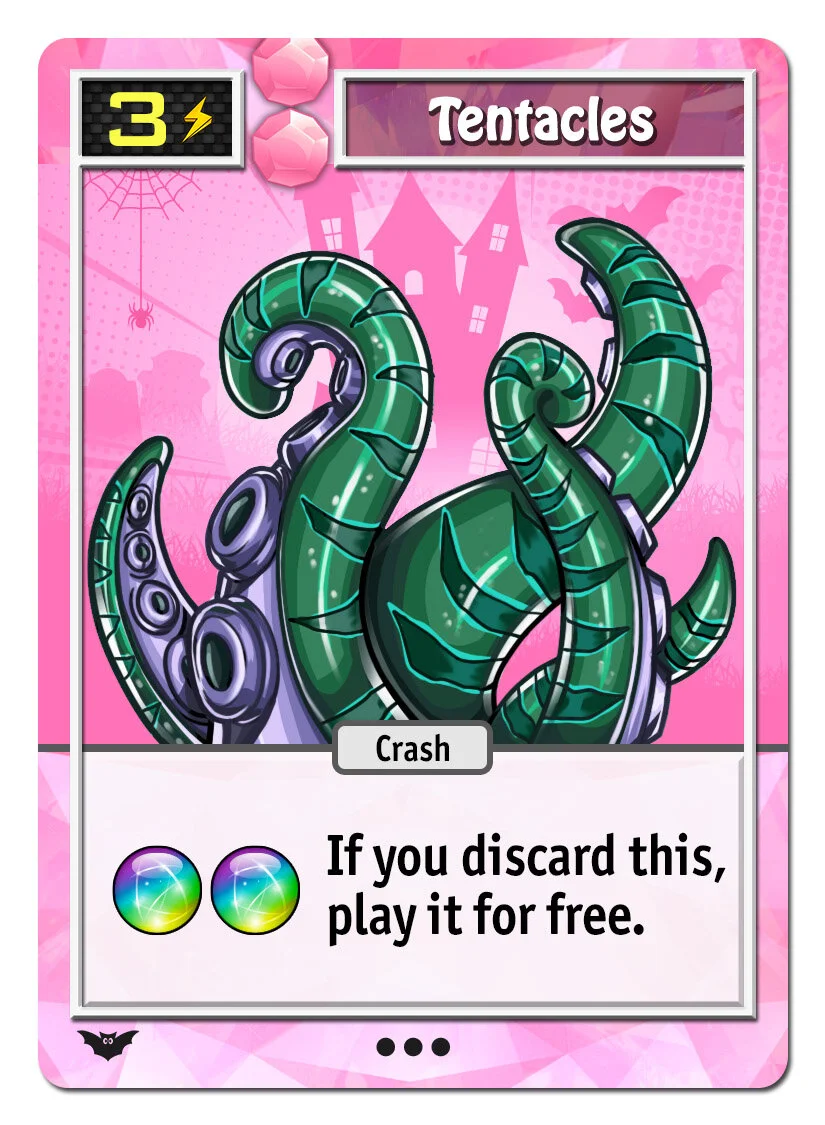
This next card has the same mechanic as the above cards, but it’s so powerful that it deserves to be shown by itself:

 
tentacles.jpg
 

A double crash for free, if you can discard it somehow!

While the cards above are of the form “Discard ME to get special effects,” some other cards are of the form “Discard ANY cards to get special effects:

 
doom_grasp.jpg
mummy_wraps.jpg
 
 
vampire.jpg
 

Getting a free crash or a free deep swap from simply discarding anything is really strong. Drawing a card for every discard you do is the powerful building block an engine (notice that Vampire is a pink card, the color that often has engine-building cards.)

There’s a few more cards that are notable for just how much they can discard:

spellbook.jpg
blue_potion.jpg

Spellbook lets you discard three cards, and is generally useful even without taking advantage of the discard mechanic. But Dark Pact relies entirely on you having a deck full of discard effects. If you do, paying 0 to discard 5 cards, probably your whole hand, becomes exciting. Blue Potion is a much more expensive way to discard your hand (2 actions), but you also get to reduce your gem pile by quite a bit, so it lets you survive the turn while counter-punching with who-knows-what discard effects.

Not everything in the deck is about discard effects. An example of another exciting card is Orchid Ritual:

 
orchid_ritual.jpg
 

If you have 1, 2, or 3 purple gems in your super meter, that’s letting you crash, 1, 2, or 3 times, respectively, for the cost of a single action. (You can’t do it with 4 gems in your purple super meter because your super meter activates and empties automatically then.) Setting up a triple crash for 1 action is incredibly satisfying if you can pull it off!

While there’s more in the Haunted House deck, this gives you a taste of the main mechanic. Making discards a resource turns things on their head and feels much different (more “haunted”?) from the other decks.